As someone that read some productivity books over the years, I have used many applications to manage my work-life activities. I eventually created my own productivity apps and display them on a second monitor or writing my daily plan and tasks on a paper planner.
The idea is to make the plan and tasks always visible to avoid the “out of sight, out of mind” problem.
Then I had an idea to create an always on productivity dashboard that will always display these information, all the time, so that it acts as a reminder/trigger for me to check my plan for the day. There are a few approaches for it.
Approach #1: display the apps on a secondary computer monitor.
This works at work or at home when I’m at the computer, but it’s not feasible to let the computer and monitor running all the time using lots of electricity, it’s also will shorten the lifespan of the computer and monitor.
I also cannot use this approach in coffee shops or when camping, for an example.
Approach #2: showing the app on an always on Android tablet or old phone.
If the Android tablet supports split screen apps, I can display my task list on the right, and my Google calendar on the left.
This should work, however letting a tablet run with the screen turned on for the whole day will quickly damage the screen and the battery. Also, no tablets have long enough battery life to last the whole day.
The solution: E-ink Android tablet.
The E-Ink screen consumes little power, does not quickly kill the screen and can last for much longer than normal tablets.
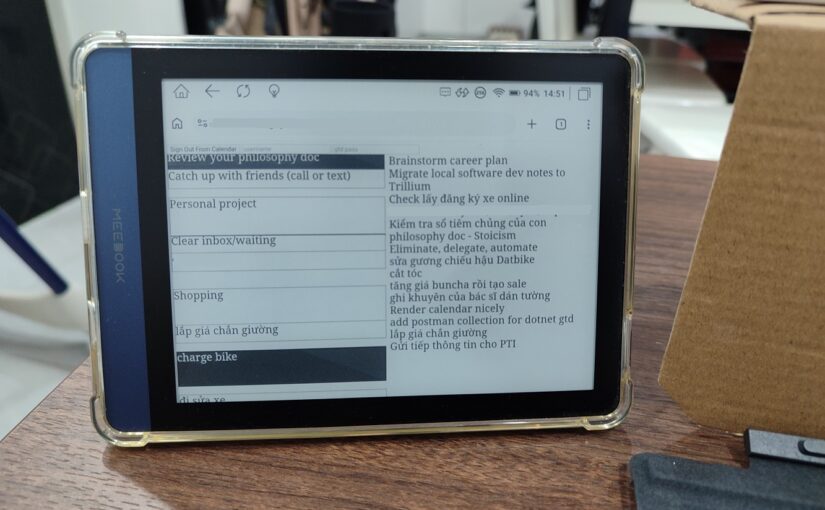
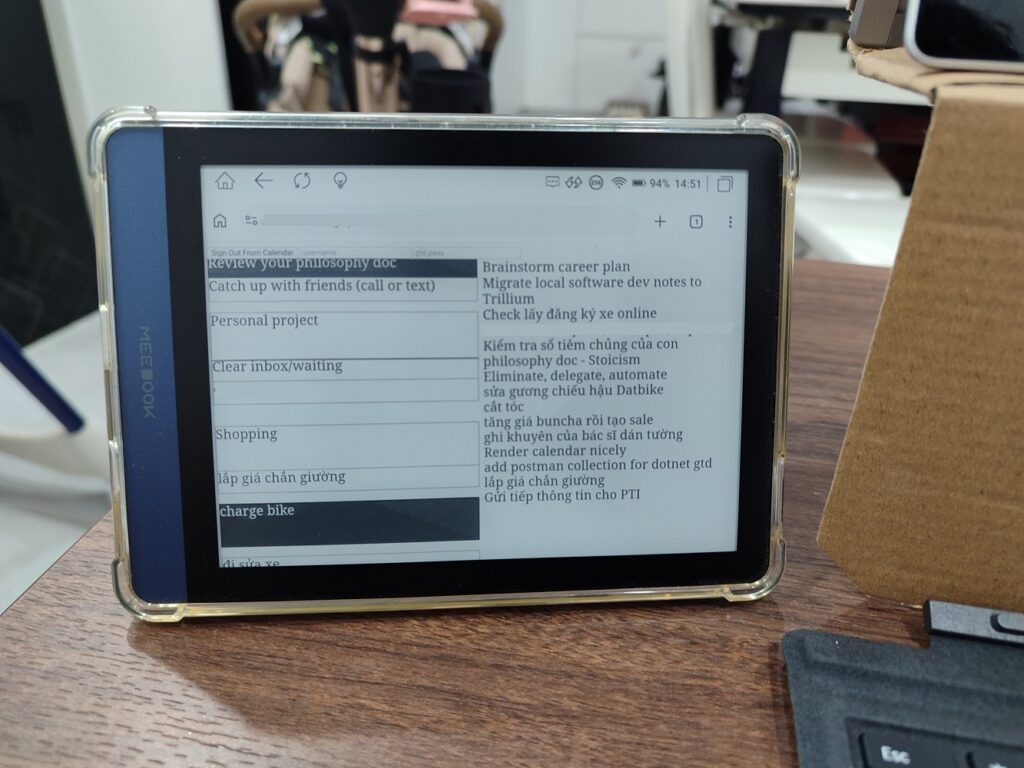
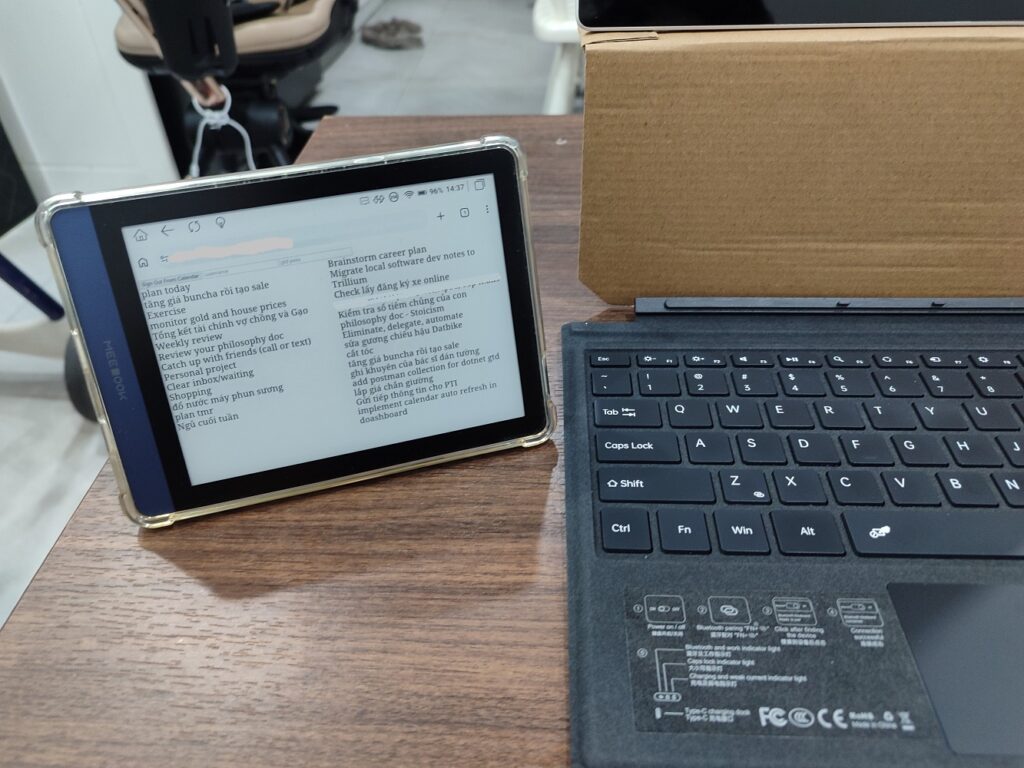
So I bought the Meebook P6 e-ink Android tablet, it’s a little 6 inch e-reader tablet.
But then when I try to use it, it appears that it does not support split screen apps, so I can’t run two apps side by side.
The bigger e-ink tablets support that feature, but they are much more expensive and bulky.
So I decided to hack together a small productivity dashboard app that displays information from two apps. So the Meebook P6 can easily display it using the Chrome browser.
The end product
The “application” is really just a small frontend website using Javascript, jQuery, CSS, and nothing else.
The features
- Showing the Google Calendar on the left.
- Events on the calendar are color coded, an event is a task that is considered “done” if it is set to a specific color in Google Calendar.
- Showing the task list from my own home made task management app on the right.
- Tapping the calendar will switch from either the visual day view, or the event list view.
- Tapping on the task list on the right will switch between two contexts: at work and at home
- The dashboard periodically refreshes the access token for the Google Calendar API, it also periodically refreshes the calendar and task view, so changes to the calendar and tasks will be quickly updated in real time automatically.
Tapping the calendar toggles it between the visual day view and the event list view.
It’s surprisingly useful. Whenever I have more control of my time, I can use the visual day view to see my agenda for the day.
Whenever I don’t have control over my time due to family matters, I use the list view of the calendar.
Initially I tried to build the dashboard using ReactJS, but quickly found that I have to spend much time researching how to authenticate with Google Calendar API in React applications, which was too time consuming. The official Google Calendar API tutorial has an example in plain Javascript and HTML, so some research is needed to get it to work in React.
Then I decided I would just implement it in the old school way, with HTML, CSS and jQuery and Javascript. The implementation started from the Google example of Calendar API integration with OAuth 2.0. I just refactor and add features until it becomes the end product. It’s a quick and dirty hack to get a simple dashboard working.
And there are even more benefits to implement the dashboard this way: it’s very lightweight compared to a big JS bundle created from a huge set of NPM packages.
So ironically, by implementing it in the hacky way, it is lighter, faster, and drains less battery as a result.
This is a great example of choosing the suitable solutions and tools for the scope of the task. Big frameworks are suitable for more complicated and feature rich SPAs. If you just want a simple UI and the effort to implement in more complicated frameworks is not worth it, choose the simpler implementation.
So far I’m quite pleased with the result. I may eventually implement a full featured React based dashboard with Google API integration, but for now this works very well.